I just thought I'd share the build instructions for Fedora 12 64-bit VMware image.
While perform the installation, I noticed that the following links need to be updated, especially with respect to the parts about updating the SD card with new firmware images for the USRP2 + WBX combination:
Although I registered on the gnuradio website, the admin didn't approve it yet, so I couldn't edit the wiki contents directly.
Elvis Dowson
Technote GNU-Radio-3.3-001: How to install GNU Radio 3.3 on a Fedora-12 x86 64-bit VMware image
Overview
This document describes how to install GNU Radio 3.3 from the git sources on a Fedora-12 x86 64-bit VMware image.
Procedure
Step 01.00: Install required packages.
$ su
# yum install fftw-devel cppunit-devel wxPython-devel libusb-devel guile boost-devel alsa-lib-devel numpy gsl-devel python-devel pygsl python-cheetah python-lxml PyOpenGL
# yum install PyQt4-devel qwt-devel qwtplot3d-qt4-devel
# yum install sdcc xlmto graphviz qgit
# yum install qt4-devel qwt-devel qwtplot3d-qt4-devel PyQt4-devel
Step 02.00: Checkout the latest GNU Radio sources from the git repository.
$ git clone http://gnuradio.org/git/gnuradio.git
Step 03.00: Configure and build GNU Radio.
$ cd gnuradio
$ ./bootstrap
$ ./configure
$ make -j 6
$ make check
$ sudo make install
Step 04.00: Allow access to the USRP2 by a non-root user.
$ sudo chmod u+s /usr/local/bin/usrp2_socket_opener
To enable real-time scheduling for non-root users, edit /etc/security/limits.conf and add the following line:
@usrp - rtprio 50
Make sure that your user is a member of group usrp, then logout and log back in.
Step 05.00: Add a second ethernet network adapter to connect the virtual machine to the USRP2.
Click on Virtual Machine -> Settings -> Network Adapter.
Add a second network adapter, and choose "Connect directly to the physical network (Bridged)" using Ethernet.
This should add a new eth2 network interface. You can list all the installed network interfaces using the ifconfig command.
Step 06.00: Allow access to the USRP2 by a non-root user.
$ sudo chmod u+s /usr/local/bin/usrp2_socket_opener
Step 07.00: Check communications with the USRP2.
$ find_usrp -e eth2
Step 08.00: Update environment variables.
Add the following lines to your .bashrc file:
#
# Environment setup for GNU Radio
#
export PYTHONPATH="/usr/local/lib64/python2.6/site-packages"
export PATH="/usr/libexec/sdcc:$PATH"
#
# end GNU Radio setup
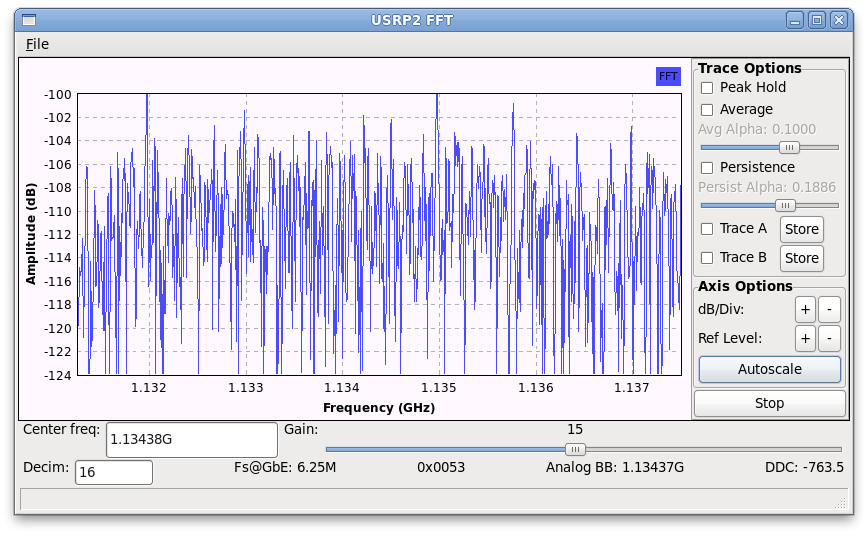
Step 09.00: Run a basic spectrum analyzer application to test the USRP2.
$ cd gnuradio/gr-utils/src/python
$ usrp2_fft.py
Step 10.00: Download the pre-built firmware images.
You can download the firmware images from
For the USRP2 + WBX combination, use the following firmware image:
txrx_wbx_raw_eth_20100608.bin
Step11.00: Update the USRP2 firmware image on the SD card.
Locate the u2_flash_tool within the gnuradio folder:
$ cd gnuradio
$ find . -name u2_flash_tool
./usrp2/firmware/u2_flash_tool
Insert the SD card into the SD card reader slot of your computer.
Run gparted, the graphical disk partitioning utility to quickly determine which device the SD card is connected. Usually /dev/sda would be your primary hard disk, and /dev/sdb would be the SD card.
Write the new firmware image to the SD card;
$ sudo usrp2/firmware/u2_flash_tool --dev=/dev/sdb -t s/w ~/Downloads/usrp2-firmware/txrx_wbx_raw_eth_20100608.bin -w
Step 11.00: Test the GNU Radio installation.
Step 11.01: Probe the USRP2 + WBX hardware configuration.
Type the following command :
$ usrp2_probe
Enter Interface: eth2, select Type: Rx and click on the Probe button.

Step 11.02 : Run the spectrum analyzer application
$ cd gnuradio
$ gr-utils/src/python/usrp2_fft.py -e eth2
Related Topics
Related Links